Have you ever refurnished a piece you just fell in love with? Well, this piece is definitely one of my favorites. I inherited it from my uncle. It was in pretty not so hot shape. Between warn varnish, broken hardware and that old musty smell well, it needed fresh eyes to bring it to its potential. Unfortunately, because I often rush in to my projects full force I didn’t think to of course snap a pic until half way through priming it. You get the idea.

So here’s the big before and after.  For more info on paint colors specifically you can read about that here in my original sneak peek post.

IMG_0287[1]IMG_0576[1] IMG_0578[1] IMG_0577[1]

After I sanded it down to the wood on the top, than did a rough sand everywhere else, I used Kilz latex primer – about 2 coats. The varnish wearing was on top thus why I sanded it down to the bones.

Mahogany is a tricky one because it often comes through pink so I figured I’d rather waste a couple of coats of Kilz rather than expensive paint. Good thing because it kept bleeding through. I could have used oil based which would have resolved the bleeding issue but I was trying to save on costs and I had the latex primer already. I ended up using a foam brush for the top, a foam roller for the remaining flat areas and a Perdy angled brush for the crevices and legs.

I sanded between each and every coat, primer included. So long story short, if you want that baby butt smooth finish, and you don’t have a sprayer than prepare to get your work on! It’s a lot of patience and elbow grease but she was worth it and it can be done.

I ended up finding the new hardware in a very limited size at Menards in Antique Brass Finish. This was way more time intensive than I thought it would be. I didn’t think to check hole size until it was all done. Oops! Did I mention how I jump right on in to my projects? 🙂

After painting it, it seemed like it needed something so I went back and did about 2 ish coats of Ebony stain just rubbing it in with a rag until I got it the way I wanted. This was my first time adding stain on top of paint. I was definitely taking a chance but it was well worth it. It gave it the richness it needed.

I let it cure for a good week inside before I added the Howards Wax. I did 3 coats of that. It’s not totally water-proof, more water-resistant but I wanted something more green and non-toxic so that was my happy medium. You have to re-wax every 3 months or so, sooner if it’s a frequently used piece. This piece isn’t so I think I will just do it a couple times a year. 🙂

Project Breakdown:

Valspar Super Flat Sable Evening Primer and Paint in One.

Kilz Primer.

Miniwax Ebony Stain

Orbit Palm Sander DeWalt

Med, Fine and Extra Fine Grit Blocks

Howards Feed n Wax Furniture Finish

If you have any questions on the process or tools I used I’d be glad to answer them.

Come check out more great projects at  Remodelaholics Link Up Party!


While attending an outdoor event, our 18 month year old daughter was quickly enticed by a sandbox. She took a very keen liking to the process of shoveling sand into the bucket and nothing was going to tear her away from that little sandbox…ok well nothing except for mom and dad when it was time to go.

Needless to say, most toddlers don’t typically transition smoothly. She screamed like I had just cut her off from her new best friend in the world. Luckily the meltdown only lasted about 10 seconds, along with the feeling of being the worlds worst mother moment. Yes, I know, I’m not really, but it does feel like for a split second when your child is crying with tears in their eyes looking at you with those big sad eyes. I’m happy to report we both moved on from that moment quick enough 🙂 .

Prior to this I had been looking for a water and sand table on Craigslist and in the store to see what I could find. I didn’t find much that struck me that was worth the money for something she’d only get a couple of months use out of.  So, my creative energy forced me to come up with a cheap solution that would serve the same purpose.

First I thought of a baby pool because those are on clearance now. That left the problem of no top on it which is not safe with all the critters crawling in and out of it. So, clearly I needed something a lot more hygienic.  Not to mention they are a little rough around the edges.

That left sandboxes with tops, which can be quite pricy, even used I wasn’t too happy with pricing and driving all over Timbuktu. If you are lucky to find one that is reasonable at a store, you usually have to order them or travel far enough to find them in stock, especially by early September. They take up even more room. We definitely don’t have the room to store a huge sandbox and who wants to be hundreds of pounds of sand to fill it in? Plus, major downside is look old quick  as they have a tendency to fade in the sun over time. Than you are stuck with a huge sandbox you are trying to sell a couple years later or sooner.

So, I figured out a more economical way to achieve the same goal. I needed a container of sorts that I could easily empty out each season and/or even reuse the container for other purposes depending on how well she stuck with this. Than after thinking about what container would be shallow and big enough for at least two toddlers to play happily that included a cover – it dawned on me.

An UNDER THE BED STORAGE BOX! I thought it was pretty brilliant and super cheap. $19 works for me. I’m sure I could have found it for even cheaper but I wasn’t about to hunt at multiple stores or try and dig up a coupon with just 3 in stock. Bags of sand are just a $3 to $4 per 50 lb bag this project was in the perfect price range. It only involved driving to two of our local stores to pick up the goods. We ended up choosing a Sterilite 74 qt clear under the bed storage container with locking lid.

Bonus: We scored on a bag of sand castle building toys at Kmart for what we thought was $7 but after checking out we high-fived each other as the cashier rang it up for just $3! Sweet!

The result: A very happy toddler and mama 🙂

container sand box

Not to bad right?

Happy Monday!

-J


I love veggies, I love salads…but sometimes you just get sick of the same ole, same ole. Right? Sometimes you just have to change things up a bit. You get sick of lettuce or spinach, heck even my favorite of eating Kale gets old. Eating healthy is the first thing to go if you don’t allow for variety and who wants to slave over a hot oven when it’s hot out. Um, not me thank you very much! So, if you are looking for that perfect healthy side with variety built-in, look no further.

I came across a bazillion recipes with their own recipes and they all seemed to be missing something. One I was even not totally sold on. Thinking, hmm…I don’t know. However I just took the plunge and went for it and added my own twist as always. Healthy, Light and Quite tasteful!

Green Bean Salad with Lemon Vinaigrette

Click Here for Printable Version: Green Bean Salad with Lemon Vinaigrette

The Goal and Key behind the success of this entire recipe – The perfectly steamed bean! 

Serves about 7-8 people or as we say more for leftovers the next day! 🙂

  • Approximately 1.5 to 2 lbs Lightly Steamed Green Beans Trimmed and kept long
  • 1 Cucumber cut into long strips about the size of the beans. Don’t use seeded part of the cucumber. Just trim the cucumber from end to end all the way around until you hit the seeded part and discard. Cut in very thin slices.
  • 1 red pepper cut into long thing strips
  • 1/2 red onion into thin strips
  • 12 cherry tomatoes halved or quartered depending on size.
  • 1/3 cup of light feta cheese
  • 1/2 cup walnuts lightly chopped

Lemon Vinaigrette Dressing

  • 2-3 cloves of freshly pressed garlic
  • 1 juice from a lemon
  • 1/2 cup of EVOO
  • 1 small shallot or 1/2 large shallot finely chopped
  • 2 Tablespoon of dried parsley or better yet 1 Tablespoon of fresh if you have on hand.
  • salt and pepper to taste.

Bring a large stock pan with about 3/4 filled with water to boil. Set aside a bowl of ice-cold water with plenty of ice for beans after they have been blanched to cool off and prevent further cooking. You could also use a vegetable steamer for this as well. I just find it easier to check them as I visually see them boiling.

Chop veggies.

Lightly salt water and place beans in with pan on high uncovered. Set timer for 3 minutes. At 3 minutes, test one. If it’s still crunchy, continue to check minute by minute. You want it al dente basically. Just past the crunchy point, chewy but not soggy or limp. As soon as you start to see a very fain green in the water they are either done or very close to done. Mine took about 5 or 6 minutes to get to this point. Immediately remove and place in ice bath. Stir them around to ensure beans get mixed and cooled off. Set side.

Make vinaigrette.

Drain beans. Place everything in a bowl.  Lightly season with salt and pepper. Mix it up well by hand. Cover with Saran wrap and place in fridge. Let everything meld and sit in fridge for at least an hour or even two if you can.

Vegan Suggestions:

Eliminate feta for vegan alternative, perhaps something crumbly and/or salty like a tempeh or tofu and nutritional yeast mixed or cheese alternative. Not sure if they have a vegan feta.

Raw Vegan Version:

Skip steaming of beans and mix and prepare salad. Let marinade a good 3-4 hours or possibly over night.

I received complements from 3 of my family members who really aren’t into eating veggies and even they were impressed. I have always said that how you prepare your veggies determines their fate. If you over cook them, under cook them, don’t season them with flavor or you use frozen instead of fresh, the average person is likely to not enjoy them. It’s a little bit of everything, especially if you are a virgin veggie eater. 🙂 You need to be fully convinced of their truest potential. This recipe definitely incorporates all of the above. Fresh, perfectly cooked and seasoned with a whole orchestra of flavor. Most importantly, preserving as much of the nutrient content in the bean as possible.

Happy Foodie Friday!

-J

P.S. I should have a photo for you sometime tomorrow evening included in the post and the printable format if you would like to print one out or you can print it out now without.

-J


I don’t know about you all, but I function way better when everything has a special place for it to go. This is definitely a process too because sometimes as you sit with things you figure out where they might better be placed. You find different ways of storing them and sometimes you even find different ways of decorating those storage “things”.

So, today I thought I’d show you a little idea I had for storing my daughters collection of hair accessories ( which we don’t currently use as she refuses to let me put anything in her hair at this phase) which I will keep around for a soon, hopefully not later time.

Make Your Own Keepsake Box for $20 or less

keepsake box

In its new place with the other accessories!

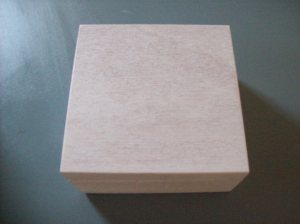
You can start off by picking out one of those plain wooden boxes that you can find at your local craft store. Don’t forget your coupon! 🙂

What You Will Need:

Regular paint brush for base coat (Optional) You could obviously use spray paint or a small acrylic flat brush as well for such a small project.

Small acrylic flat brush for second coat touch ups.

Small thin acrylic brush for touch ups around stencil area.

Stencil Brush : I prefer the actual brush, not the cheap foam ones because they over-soak and then cause more bleeding. Just a personal preference. Maybe you guys have had better luck with those. So, to each their own.

Paint samples or extra paint of choice.

Stencil – I ended up using a quilting stencil because I loved the pattern on it.

This was the before – sad right?

plain white keepsake box

Time to get a paintin’! My box dried within 10 minutes or less. I did a second coat and touch ups with a small flat acrylic brush.

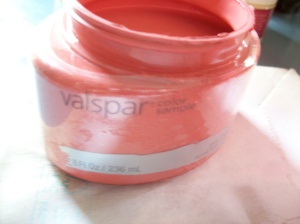
For this project I went with Valspar Satin Sanora Rose paint sample that I scored on clearance for just $2! It was the perfect match for an ottoman I had picked up last year at Target on Clearance which was clearly a double bonus. Perhaps you notice a theme – I’m all about CLEARANCE! 🙂 This was for the base coat. For the stenciled part I went with Behr Topiar Mint.

Valspar Satin Sanora Rose

Valspar Satin Sanora Rose

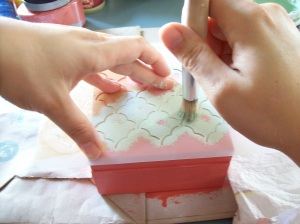
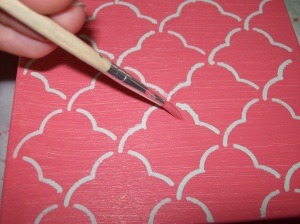
Next, start a stenciling. I just placed the stencil in the center on the top and just filled in the stencil on top and bottom areas thereafter.

stenciling

After the paint dries, just went back with the contrast paint and/or base paint and did touch ups where I needed around the stencil area. I used a super small brush for this. I actually found a much thinner one that I didn’t take a pic of (sorry) and used that and it worked even better. You definitely need a steady hand but a thin brush helps a ton as it’s much more forgiving.

touch ups

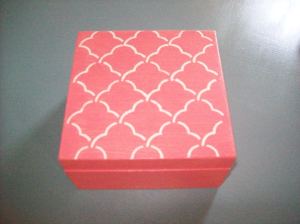
Let it dry and voila! All done!

Finished Stenciled and Painted Keepsake Box

Finished Painted and Stenciled Keepsake Box

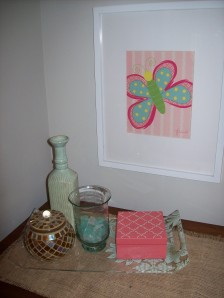
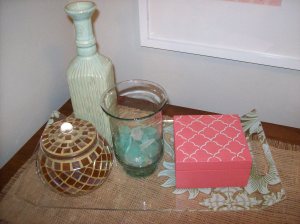
Here she is all pretty with her companion accessories.

close up

Amongst Friends!

Even a nursery needs accessories. How cute is this little keepsake box. Now it serves a dual purpose, it’s not only essential for organizing all her little hair stuff, but it adds a nice accent and pop of color to her dresser as well.

This project was done in less than an hour during nap time! 🙂

Hope you feel ready to tackle your own little keepsake box.

Happy Creating!

-J


Hi all!

I hope you enjoyed a Happy Labor-FREE Day. I know we sure did. Two parties in one day. This family hasn’t seen that much excitement in a while. I’m tired! For real. 🙂

I did miss working on my current project today, as it was the first perfect weather day after a long week of serious humidity and a few days of rain. High humidity=No Painting Outside. Boo! So, hopefully it is back to happy painting again tomorrow.

Speaking of painting, here’s a sneak peek of the new color for the buffet. I finally decided! Woohoo! It’s by Valspar and the finish is Super Flat, Paint and Primer in One with a similar chalk like finish so I hear, so I was willing to give it a whirl. So far I love the finish! I did actually pre-prime it with Kilz because I just like to make sure to seal in the stain underneath. Sometimes it can alter the color even with the primer mixed in with the paint. Plus there’s something about just coating a piece in white first and you can just look at it with fresh eyes – kind of like starting with a clean slate so to speak and I rather waste several coats of primer to ensure proper sealing than on expensive paint. Nobody wants pink mixed with their gray – EEK!

Paint Color Selection & Finish:

drawer

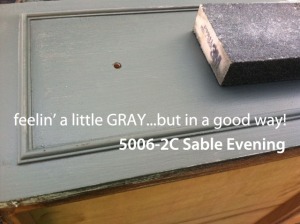
I ended up choosing Sable Evening as the color. A very dark charcoal gray. Absolutely beautiful. The perfect color to go with just about any other color. I’m so excited to see the final product, oh wait, I mean for all of you to see the final product. Originally, I was going with a solid finish but after painting and sanding and just living with it, well, I felt like it was screaming to have more of that aged look. While in the course of refinishing and sanding my arm off, I decided if I’m going to do this as a side business, well I needed to starting adding to my tool arsenal.

I LOVE my new tool!

After reading a detailed and extremely helpful review on the pros and cons of 10 Random Orbital Sanders that were put to the test on the Popular Mechanics Website I had a pretty good idea what I was looking for. Than I suddenly remembered I had just come across a Labor Day Special for one of the 10 at an awesome price of just $39 at Ace Hardware. That was a no brainer!  I ended up going with the DeWalt D26451 Random Orbital  Sander and I have to say I love it! Talk about the stars lining up!  Granted I would have loved to have a belt sander as it is much more time efficient but in due time. You have to start somewhere, right?

Besides, it is also a good middle ground tool in between a belt sander and an orbital sander. It does take a little more time but I have zero complaints. It is totally smooth and has a lot of control and zero dust. Would highly recommend it. No, I’m not getting paid by DeWalt either. I am just sharing the tools I use and love with you guys just because I love you all. 🙂

d26451

So, if you too are just starting out or in need of one for a home project and you end up going to the store to price them out and you find yourself staring at a slew of semi-intimidating  tools with varying prices and like me almost start to develop a slight panic attack, well first BREATHE. See, weren’t you having a moment of panic right along with me. Phfew! That was intense! Good news, I can help you. Well, Popular Mechanics can help you. I did the hard work for you, I googled and this is what I came across and boy did it renew my confidence quickly. This Popular Mechanics article helped me know the difference of what I would be getting with each type and what purpose they served. Again thank you Popular Mechanics, I may just have to subscribe to you! 🙂 Clearly they knew I wasn’t the only confused individual out there. Hah! Even the gentlemen next to me seemed to be confused as they were arguing about which was better. How silly of them 🙂

So, I hope that arms you with some good info, if not at the very at least I hope you enjoy my humorous take on my little adventures.

See you soon,

-J


Happy Foodie Friday Everyone! –

I don’t know about you all but pancakes are a staple in this house! My husband makes them on the weekend, thus the name weekend oat-cakes 🙂 and we all love them, especially the little lady! You can always make them any day of the week though. I sometimes freeze them in batches for busy days and weekends when we are in the mood for them but don’t always have time to whip up a batch.

Traditionally, they are made with white flour, oil and white sugar – neither of which is all that nutritious. Not to mention anything white like flour and sugar is over processed and void of any nutritional value with added chemicals. Wheat isn’t feasible for people with gluten sensitivity and super high on the allergen list in general. Overall, not really beneficial to any of us, much less a growing child. You can swap this recipe out with whole ground wheat flour but I find a lot of people don’t care for the harsh taste and because of that I’m not a fan of using it in pancakes, plus it’s pricier.

Over the years, I started figuring out ways to get more bang for my calorie = more nutrition, less sugar, more whole grains, etc. After experimenting a little, trying whole wheat, buckwheat and quinoa, in the end I chose oat flour. It’s cheap and readily available.  It took these pancakes to a whole new level. I will never go back!  All you have to do is buy bulk oats and mill them yourself. Way cheaper than buying it pre-packaged! It gives it a nice, nutty like flavor. Trust me. 🙂

I believe food should be nutritious AND taste yummy too! You shouldn’t have to settle for one or the other.

Don’t forget to check out the Healthy Foodie Swap Outs after the recipe for more great ideas!

oat pancakes

Weekend Oat-Cakes (Pancakes)

Makes about 12-15 silver dollar size cakes

  • 3 cups of ground oat flour
  • 2/3 tablespoon of stevia (not liquid drops although you can use those too.) Original recipe calls for 2 Tablespoon of sugar.
  • 2 teaspoon of baking powder.
  • 1/2 teaspoon of baking soda
  • 1/2 teaspoon of salt
  • 2 beaten eggs
  • 2 – 2.5 cups of almond, coconut or milk of choice or you can also .
  • 1/4 cup of unsweetened applesauce
  • 3 Tablespoons of ground flaxseed

Optional: replace eggs with ground flax-seed.  1 Tablespoon of water to 3 Tablespoons of ground flax-seed per egg. Be sure to let sit for 15 min to thicken and you may want to reduce liquid to half. It gets a bit gummy in texture. Sometimes I test cook one before adding more liquid. Just omit the original optional 3 Tablespoons of ground flax included in the recipe.

 * I use coconut oil for lightly coating the pan. I don’t care for the cooking sprays as they contain silicone. 😦 I do have a pump bottle that I use though, which I highly recommend.

Just throw it all together in a bowl and mix. I usually use a 1/4 cup measuring cup to dispense batter into pan.

Cook first side on medium heat until top it has bubbles than flip.

NOTE: It’s important to keep any leftover seeds like flax, chia and pumpkin that are ground, refrigerated in a airtight container to maintain healthy oils and nutrients. Additionally, especially with smaller seeds like flax, they need to be ground as our digestive system can’t break them down and you won’t benefit from their goodness. Even if you are adding them to a smoothie. The average blender will not break them down.

—————————————————————————————————————————————————————————–

HEALTHY FOODIE SWAP OUTS

INSTEAD OF EGGS : USE FLAX SEED. 1 Tablespoon of Ground Flax to 3 Tablespoons of Water.

INSTEAD OF OIL: USE EQUAL PARTS APPLESAUCE

INSTEAD OF SUGAR, TRY STEVIA OR XYLITOL. See instructions for conversion for sugar recipes.

INSTEAD OF SOUR CREAM, USE NON-FAT GREEK YOGURT

INSTEAD OF RICE, USE CAULIFLOWER ( Just pulse a few times in the food processor until  size/texture resembles that of rice. Be sure to pat dry before hand.) Saute in a little EVOO.

INSTEAD OF SPAGHETTI/PASTA, USE SPAGHETTI SQUASH.

Hope some of these are helpful and enjoy the oatcake recipe.

Have a blessed weekend.

– J


Sneak Peek & More!

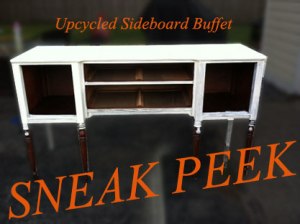
While having a garage sale a couple of weekends back my uncle dropped off a few pieces of furniture to sell for him and I just stood there staring at this little lovely – and I knew right where it was going, home with me to be shown some serious TLC.  I mean who would want to pass up such a score? not me, that’s for sure!

Unfortunately, I didn’t take a complete and “official” before pic, thus the half-painted, oh crud I need a pic, kind of pic but none the less, here she is. 🙂 Half primed.

sideboard_BLOG

Some people are truly great about always having a camera to shoot as they go. This is something I definitely have to work on. I usually at least have my iphone because It’s quick, it works and it’s always on and I’m always snapping picks of the little lady but I didn’t happen to have it with me at the time and didn’t think about it until I began priming – of course! So classic of me. I’m always too eager to start the project rather than stopping to document the process. Totally working on that as it’s kind of part of the whole blogging thing – shocking I know lol.

On a deeper level though, I have to remind myself it’s not about the destination but the journey.

I don’t know about you, but sometimes I get so caught up in getting to the next phase. I often find myself stopping abruptly wishing I could go back simply because I didn’t take enough time to stop and notice it in the first place. Usually, just brushing it off as an obstacle to be removed, or something to hurry through, rather than seeing it as a teachable moment needing to be embraced. Probably a moment that was meant to be part of the journey in the first place.

These moments I believe are of such great value. Ironically, most often they are just a whisper in the amidst the loud chaos surrounding us, constantly trying to get us to pause long enough to get our attention. Being wise enough to silence the chaos, so we can learn how to take it all in, now that I believe, at least for me, will be an evolving and life-long learning lesson.

“LIFE IS A JOURNEY, NOT A DESTINATION.” – Ralph Waldo Emerson

And More…

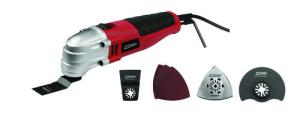
Now onto the details. As I was documenting, a-hum, I mean painting and sanding, I remembered this little tool I had lying around with a sander on it. I needed to get into a couple tight spots to sand down some rough areas and I was tired of doing it by hand. So, I gave this little guy a whirl. Not to shabby I will say. We have already used the saw and scraper attachments with much success so I had enough confidence to test it out. Worked marvelous.  Super easy, it doesn’t vibrate  your arm off, and works hard, quickly. We picked it up from Menard’s for right around $30. Comes with all the attachments. It is not cordless though but that doesn’t bother me too much. So, if you looking for a multi-function tool, that you can use for jobs around the house, I thought I’d pass it on as it’s low on cost and performs quite well. It’s made by Tool Shop. Harbor Freight has as similar one but you have to buy the attachments separately. I’m not even sure this guy has additional attachments but I haven’t checked into it. Now I am thinking I will though.

Tool Shop Multi-Function Tool

Under $40

Check it Out Here

toolshop18Aoscillatingtool-newhole

Time for more painting 🙂

– J


Happy Friday Everyone!

I have officially deemed Friday posts dedicated to all things good in the world, FOOD! 🙂

Each Friday I plan on posting a yummy and healthy recipe to share with you. I know that being a busy momma who’s trying to feed a growing and sometimes picky toddler, along with trying to eat healthy can be quite the challenge. So, as I find recipes that are a success, I’d figure I’d go ahead and put them up for you to try if you choose.

Overall this recipe is pretty healthy and you can watch your fat by simply reducing or eliminating your cheese and using a low-fat or fat free version and being very frugal with your EVOO. In short everything is customizable to your needs.

Now let me premise, you don’t have to be a vegan to eat this and if you are vegan you can just substitute for the cheese portions.

So, without further adieu…

Today’s Recipe:

Tofu Parmesan with Zucchini Spaghetti.

Image


Ingredients:

  • 2 medium size zucchini’s
  • 12 oz (4 servings) of organic tofu
  • Marinara, Pasta Sauce of Choice.
  • Shredded Mozzarella or Mozzarella Combo of Choice.
  • Grated Parmesan
  • Dried Parsley
  • Salt & Pepper
  • Panko Crumbs
  • EVOO

Preparation Option 1:

  1. Boil water as you would for pasta.
  2. Heat Sauce in sauce pan on medium until hot and boiling and return to low and cover.
  3. Cut off ends of zucchini. Use a julienne peeler and go from end to end rotating each time to get even julienne slices. Continue all around until you hit the fleshy, seeded center. Discard or you can chop up and add to sauce. Set aside.
  4. Cut Tofu into about  ½ inch slices. Should yield around 4 to 8 servings, depending on thickness.
  5. Prepare a shallow bowl with about ½ cup panko crumbs to ¼ cup of grated parmesan cheese. Add about 2 Tablespoons dried parsley and pepper to taste. Mix. You may need to add more if you run out depending on amount of Tofu. Take Tofu slices and press into crumb mixture on each side. If you need to just press the crumb mixture into tofu slices to get better coverage. Set aside.
  6. Add zucchini spaghetti to water. Stir. Wait about 3 to 4 minutes. Don’t overcook or it will be mushy. Check after 2 minutes or so. You want it al dente. Not crunchy, but not mushy either.
  7. Meanwhile, sauté tofu slices in a pan with about 2 Tablespoons of EVOO on each side, until golden brown.
  8. Plate zucchini pasta immediately after done and drained.
  9. Top with tofu slices. Add sauce. Sprinkle with shredded Mozzarella.

Quick Tip:

You can always prep zucchini the night or morning before and place in an airtight container.

Some of you may not be tofu fans and that’s ok though I urge you to give this recipe a good try before you completely write it off. Even my picky toddler gobbles it right up. No joke. However, you can always at least use the zucchini spaghetti in place of pasta served with whatever edition you choose.

Happy Foodie Friday!

– J


This poor chair was just waiting for a little extra TLC.

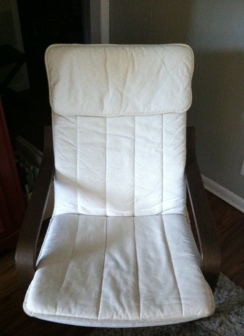
I don’t know about you but I have thought to myself time and time again, hmmm, should I sell it, keep it, get a new cover, sew a new cover…well, I decided to go ahead and keep it and spruce it up a bit.

Problem:

Lacking Personality & Hard to Keep Clean

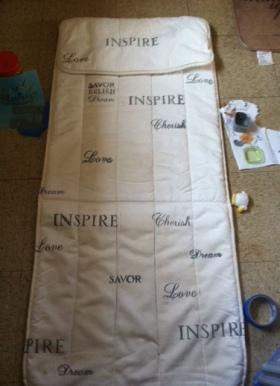
whitecover

Poang chairs are nice and all, but it’s not a forever piece of furniture and because I constantly change my decor and color scheme, I didn’t want to pay for a custom cover because it just wouldn’t be worth the investment. Besides, I’m all about taking the old and making it into to something new, or at the very least improved.

My Solution:

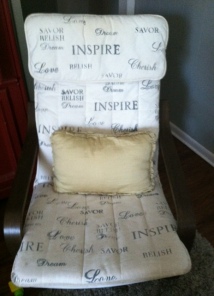
A Typography Stenciled Chair Cover

cc

A while back, last year, I purchased some typography stencils from the Martha Stewart Line at Michael’s when I was in one of those I like them enough to buy them and use them for something eventually, some day mood.

So, today, “eventually” came. As soon as I got little lady down for her nap, I went to work. Total prep and work time was about an hour and a half.

cc2

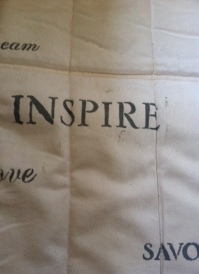
I just mixed my own dark gray color with the supply of acrylic paints I had on hand and off I went. I started with the boldest font first and then filled it in with the other ones. I also used painters tape to keep it in place. I did take the cushion out before hand but you would still need to apply some pressure to the stencil, especially across the creases in the cover to ensure even coverage.

I did it lighter in some areas and dark in others. To me, it looks more aged that way. I did make a few oops in spots where the paint bleed through or it was too intense on one letter but honestly it just kind of gave it more character in my opinion. In the end it turned out pretty darn good if you ask me. Honestly, what I love the most is the meaning behind the words.

Inspire, Cherish, Dream, Love, Savor & Relish!

The best part for me, is that it better masks the wear of daily life and a messy toddler, in addition to the occasional mommy spill! Now every day I can look at this chair and not feel so bad for it and be reminded to be inspired and to do my best to inspire others! 🙂

So what are you waiting for? It’s time to do your poang cover or something else waiting for a little extra love. Happy Painting!

finished chair cover


From Drab to Fab in Five.

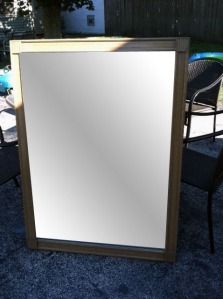
What do you do with a ginormous mirror that’s caught in a serious time warp?

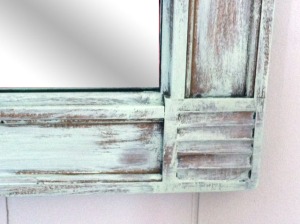
Well, you paint it but of course. After living with it for a few weeks trying to figure out what to do with it, I decided I just had to do something. So, with paintbrush in hand and a sample of Behr’s Topiary Mint, I just went at it. I knew it was asking for a white washed beach-y like finish deep down inside and that’s exactly what it got.

In case you haven’t white washed it’s not to hard. There is a difference between white washing and dry brushing. Technically it is dry brushing, the average person will probably understand that white washed means it has a that worn look to it. If you are thinking of trying, I dare you. Start on something small like a mirror or a wood tray, jewelry box, picture frame, etc. Something that won’t send you into a freak out mode. hah! I always remind myself, it’s just paint, you can paint it again and again.

How I Achieved the Look

Step 1. Lightly sand with fine grit sanding block or steel wool, my preference is steel wool.

Step 2. Give it a good cleaning to remove residue and loose oils, etc.

Step 3. Tape inside edges of mirror with painters tape. You probably know about this though…but just in case.

Step 3. Grabbed my Perdy angled brush and lightly dipped the very top edge and than blotted it on something dry or you can use cap of jar as well.

Step 4. Just barely skim the surface as you get started and do long strokes. When the brush runs across the wood with no paint, time to re-dip 🙂

You can do certain areas more concentrated but overall it should feel pretty light and airy in order to let the original grain come through. You are the designer though so do what feels right for you.

Mirror Redo.

Mirror White Wash

FROM DRAB…

Whitewashed Mirror

…TO FAB! IN 5 MINUTES